Tag Archives: installation

Installing or Upgrading Servicedesk 7.0 MR2 to 7.1 – Using a Domain-based Service Account

Article: HOWTO49691  |  Created: 2011-04-14  |  Updated: 2011-04-14
Please find attached the document for Installing or Upgrading Servicedesk 7.0 MR2 to 7.1. 

SD 7.1 Upgrade and Install.pdf

This document guides one through the installation process that will allow automatic authentication using the logged on user’s credentials. Next steps in Process Manager after install are:

1. Browse through pages like Application Properties and Master Settings to ensure things installed correctly.

2. Enable Active Directory Authentication
Admin>Portal>Master Settings>Process Manager Active Directory Settings

  • Active Directory Authentication – checked
  • AS Sync Process Interval (In Mins) – checked
  • Sync Only Users – checked
  • 3. Add Active Directory Servers
    Admin>AD Servers

  • Auto Create User On Initial Login – checked
  • AD Users Default Groups – All Users
  • Run Update Sync Process to import users and start assigning to roles
  • 4. Use a GPO to configure users intranet zone to contain the URL of your ServiceDesk
    User Configuration>Policies>Windows Settings>Internet Explorer Maintenance>URLs/Important URLs

  • Name: http://ServiceDesk.company.com
  • Value: 1
  • .

    ServiceDesk Postinstallation Configuration Wizard Timed Out

    After you finish installing the ServiceDesk application, you should immediately complete the postinstallation configuration wizard.  If you wait too long, the process times out and you have to manually relaunch the postinstallation configuration wizard by opening up a Web browser window and browsing to:

    http://localhsot/SD.Installation.PostInstallWizard.default.aspx

    If you are unable to relaunch the postinstallation configuration wizard using this method, you must rerun the ServiceDesk application installation from the beginning. The wizard is only available for completion on time (it is deleted upon its first completion).

    Installing LAMP on CentOS

    Install Apache HTTP Server (httpd) and PHP 5.3.8

    Reposted from Here.
    1. Change root user
    su –
    2. Install Remi repository
    ## Remi Dependency on CentOS 6 and Red Hat (RHEL) 6 ##
    rpm -Uvh http://download.fedora.redhat.com/pub/epel/6/i386/epel-release-6-5.noarch.rpm
    ## CentOS 6 and Red Hat (RHEL) 6 ##
    rpm -Uvh http://rpms.famillecollet.com/enterprise/remi-release-6.rpm
    3. Install Apache (httpd) Web server and PHP 5.3.8
    yum –enablerepo=remi install httpd php php-common
    4. Install PHP 5.3.8 modules
    yum –enablerepo=remi install php-pear php-pdo php-mysql php-pgsql php-pecl-memcache php-gd php-mbstring php-mcrypt php-xml
    5. Start Apache HTTP server (httpd) and autostart Apache HTTP server (httpd) on boot
    service httpd start ## use restart after update
    chkconfig –levels 235 httpd on
    6. Create test PHP page to check that Apache, PHP and PHP modules are working
    Add following content to /var/www/html/test.php file.
    <?php
        phpinfo();
    ?>
    7. Check created page with browser
    Access following address, with your browser. http://localhost/test.php

     Enable Remote Connection to Apache HTTP Server (httpd) –> Open Web server Port (80) on Iptables Firewall (as root user again)
    1. Edit /etc/sysconfig/iptables file:
    nano -w /etc/sysconfig/iptables
    2. Add following line before COMMIT:
    -A INPUT -m state –state NEW -m tcp -p tcp –dport 80 -j ACCEPT
    3. Restart Iptables Firewall:
    service iptables restart
    ## OR ##
    /etc/init.d/iptables restart
    4. Test remote connection
    Access following address, with your browser. http://your.domain/test.php

    Manually Installing the Symantec Management Agent

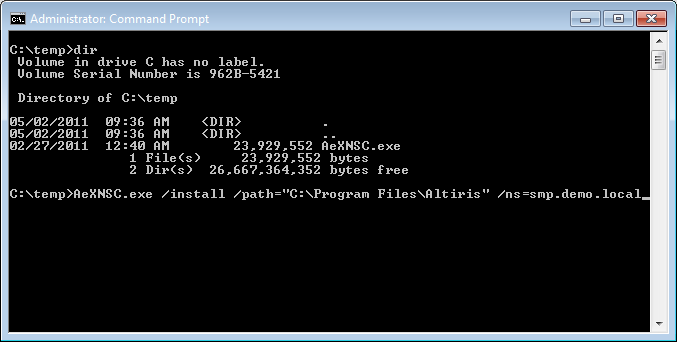
    While logged on to the machine you want to install the agent, locate the installation file.  One place to get the file is to drill down into the Symantec Management Platform (SMP) server NSCap share that is created when the server is installed.  In the example below, <SMP Server> is the hostname or FQDN of your SMP server.

    \\<SMP Server>\NSCap\bin\Win32\X86\NS Client Package\AeXNSC.exe

    Copy the file to your machine and then open a command prompt to execute AeXNSC.exe.  Run the command prompt as administrator on Windows 2008 and Windows 7.  In my example here, I placed it in C:\Temp because I will not actually need the file after the installation is done.

    Determine where you want the installation path to be.  If this is going to be a package server, make sure that the location is somewhere you’ll have plenty of disk space for packages.  In my example, I’m using the default.  You can substitute anything else you want, like “E:\ServerApps\Altiris” or whatever… You’ll also need to inform the installer what the FQDN of the SMP server is.  The sytax is like this:

    AeXNSC.exe /install /path=<My installation path> /ns=<SMP FQDN>

    The installer then decompresses to start installing.  It went by too fast for me to catch a screenshot of it.  It looks very similar to other installers that count to 100.  Once the installer finishes running you’ll get a success prompt that will look similar to this one.  If you’re maticulous, you can delete AeXNSC.exe that you used to start the installation.

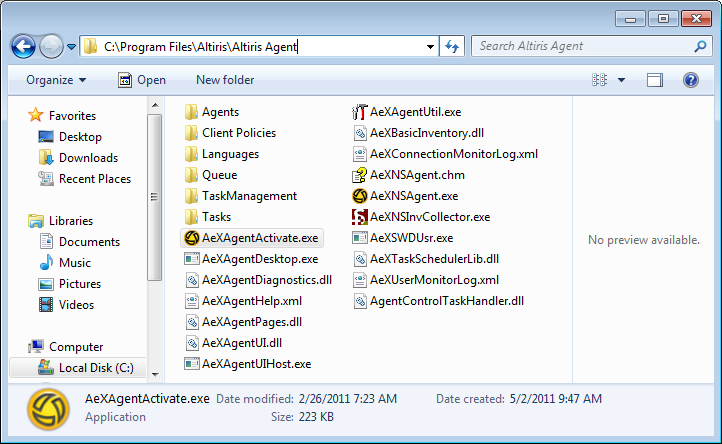
    You can monitor the installation by drilling down to the installation path. 

    Optionally, you can also launch AeXAgentActivate.exe to monitor a little closer.

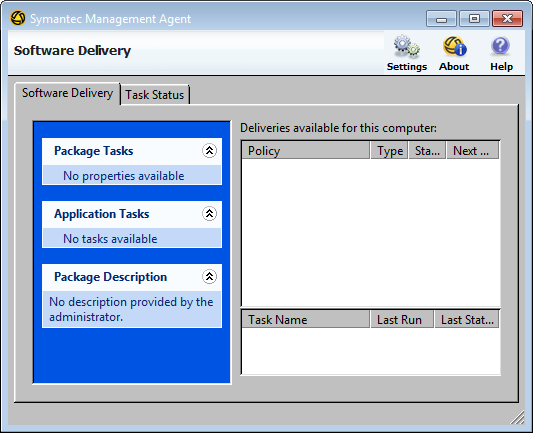
    Click on the settings link  to look at the Agent Settings.

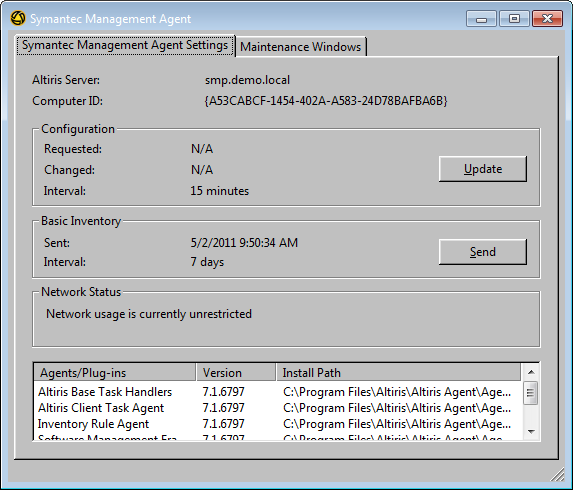
    You’ll see that the SMP server is shown with what we told it with the /ns switch.   Within 15 minutes, it will update with the SMP server, get applicable policies and proceed to be managed.  If you’re kind of impatient, you can click the Update button to try and force it to update with the SMP server and keep things moving along.  This works kind of like when a pedestrian would press the walk button at an intersection.  After the first update, the button is more responsive to policy updates.  As new plug-ins are installed, the agent will restart and close these windows.  That’s a good sign that things are progressing along as intended.